 |
| Mahogany body & neck arrive from Precision Guitar Kits in Vancouver, 31 Aug 2013 |
 |
| Back view |

 |
| Precise, tight neck fit |
 |
| Trying out some dye mixes |
 |
| Alcohol based dyes mixed with SealCoat and denatured alcohol to seal/add color |
 |
| 3M Stikit sandpaper: the greatest thing since sliced bread |
 |
| Excess glue will scrape off easily once dry. |
 |
| Titebond II Dark glue is great for darker woods like mahogany. |
 |
| Ebonized/pickled headstock. Simple vinegar & steel wool solution. |
 |
| Mahogany color grain filler. |
 |
| Shellac is really starting to bring out the glow. |
 |
| Scrap block in pickup rout keeps body off table while finishing. |
 |
| Not happy with the color? Time to sand it all down again! |
 |
| All ready for final polish |

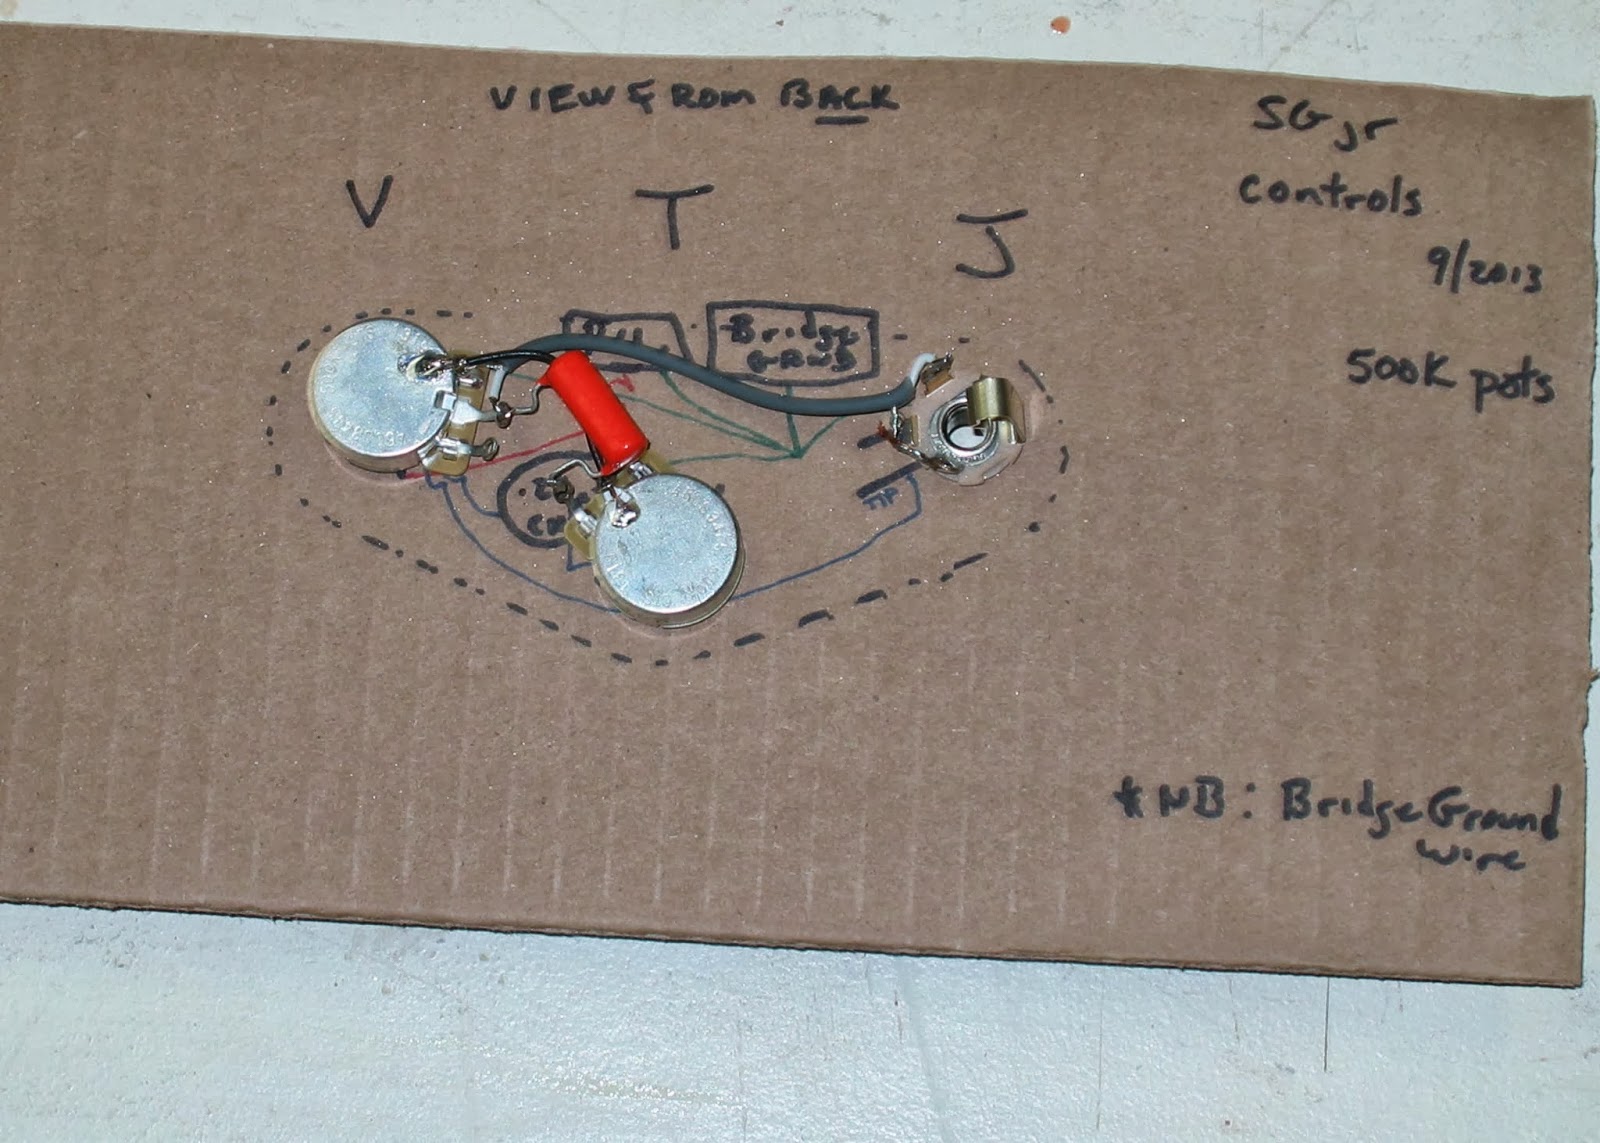 |
Laying out the controls |
 |
| Ground wire soldered to bridge stud insert |
 |
| I created my own templates for the pickguard, control cavity cover and truss rod cover |
 |
| Adding the bevel to the pickguard |
 |
| Sheilding on the control cover |
 |
| Using the drill press to press fit the bridge stud inserts. |
 |
| Gauged nut files great for checking action at 1st fret. About 1/8" will have to be sanded off bottom of nut before installation. |
 |
| Sanding jig for level, right angle sanding of bottom of nut |
 |
| A few drops of white glue and light clamping pressure to seat the nut |
 |
| Using painter's tape as a straight edge to align tuners |
 |
| Pre-drilled bridge insert holes on this kit from Precision work best with non-compensated wrap tailpiece because of the fairly acute angle relative to the nut. For fun, I tried a stop tailpiece from a T.O.M. set and it was very close intonation-wise. I'll play with a few options to see what works best. |
 |
| Finished! |
 |
| In the bright sunlight, picture looks much lighter than finish really is. Will have to add some better pix |
No comments:
Post a Comment